Just because you want a stunning braided hairstyle doesn’t mean you need a professional stylist. With our comprehensive step-by-step tutorials, you can effortlessly create gorgeous braids that enhance your look for any occasion. Whether you’re a beginner or seeking to perfect your technique, these guides will equip you with the skills to master various styles, including classic French braids and chic fishtails. Get ready to turn heads as you discover how to elevate your hair game and express your personal style with your newfound skills.
Unlocking the Foundations: Essential Tools and Products
Must-Have Styling Tools for Perfect Braids
Your braiding journey begins with the right tools at your fingertips. Invest in a good quality hairbrush or comb to detangle your locks before you start weaving. A wide-tooth comb can help minimize breakage, making it easier to gather your hair without any snags. Additionally, a set of hair clips is important for sectioning your hair and keeping everything in place while you work on your braid. You can find clips in various sizes, but opt for sturdy ones that will hold your hair securely without slipping.
A fine-tooth comb is another handy tool, especially if you want to create a sleek finish. You should also consider investing in a rat-tail comb for precise parting and sectioning. A good-quality hair tie is equally important—choose one that won’t snag or break your hair. Finally, don’t underestimate the value of a spray bottle filled with water or your favorite leave-in conditioner; this can help control frizz and add moisture while you style.
Key Hair Products to Enhance Your Braiding Experience
Hair products play a significant role in the success of any braided hairstyle. A lightweight styling cream or mousse can provide the hold you need without weighing your hair down. Applying a small amount of cream can help tame flyaways and give your braids a polished look. For those with thicker hair, a curl defining gel can aid in achieving more meticulous twists and texture that holds throughout the day.
Don’t overlook the benefits of a hair spray, particularly if you’re looking to maintain your masterpiece for hours. A flexible hold hairspray is ideal as it provides support while still allowing some movement, ensuring you don’t end up with a helmet of hair. Additionally, a heat protectant is important if you plan to use any styling tools that involve heat before braiding. These products not only keep your hairstyle intact but also protect your locks from damage.
Consider adding a finishing serum to your arsenal as well, particularly one that contains natural oils. These can smooth down any remaining frizz and add a beautiful shine to your braids. When choosing products, look for those that suit your hair type; dry hair might benefit from moisturizing products, while oily hair could use lighter formulas to avoid greasiness. Tailoring your product selection to your hair needs will enhance your braiding experience immensely.
The Classic French Braid: Your Gateway Technique
Step-by-Step Guide to the French Braid
The French braid is a timeless hairstyle that not only looks elegant but also serves as the foundation for many other intricate braided styles. To start, gather your hair and separate it into three equal sections. The key to a perfect French braid lies in the way you add hair from each side as you go along. Begin by crossing the right section over the middle section, followed by the left section crossing over the new middle. As you repeat this process, gradually incorporate more hair from the sides into the braid. Keep your tensions steady for a uniform look throughout the length of the braid.
As you continue, maintain control over the braid’s direction. You can choose to pull it tightly for a neat, polished finish, or keep it slightly loose for a more relaxed effect. After you’ve reached the desired length and incorporated all the hair, secure the end with a hair tie. This classic technique can take some practice, so don’t hesitate to try it a few times in front of a mirror until you feel comfortable.
Table: French Braid Steps
| Step | Action |
|————————|—————————————————————————————|
| Step 1 | Divide hair into three equal sections. |
| Step 2 | Cross the right section over the middle section. |
| Step 3 | Cross the left section over the new middle section. |
| Step 4 | Add hair from the sides to each section as you braid. |
| Step 5 | Repeat until you reach the end of your hair. |
| Step 6 | Secure the braid with a hair tie. |
Common Mistakes and How to Avoid Them
When learning to create a French braid, several common mistakes can detract from your efforts. One of the biggest missteps is not taking even sections of hair. If the pieces you use to braid vary in size, it results in an uneven braid that can look unkempt. Additionally, failing to incorporate hair evenly from both sides as you braid can lead to lopsidedness, making it important to keep your sections balanced throughout the process.
Another common error is pulling the sections too tightly. While it’s important to have a firm grip, pulling too hard can lead to discomfort and tension headaches. Aim for a snug fit that allows for some movement; this way, the braid remains chic and flexible. If you’re struggling with the grip, consider using a lightweight styling product that adds texture without stiffness, facilitating better control.
Elevating Your Craft: The Dutch Braid Demystified
Technique Breakdown: Mastering the Inverted Braid
The Dutch braid is often referred to as the inverted braid, and it encapsulates a stunning twist on the classic French braid that creates a beautifully raised effect. Start by gathering your hair at the crown and sectioning it into three equal parts. With the basics in mind, the magic happens when you cross the strands beneath each other instead of over, as you would with a French braid. It’s this distinctive shift in technique that creates a plump and dimensional look, making it an ideal choice for various occasions.
To ensure smooth, even strands, practice pulling tightly yet gently as you incorporate hair from the sides into the central braid. Repetition will help you develop the appropriate tension, resulting in neat and structured braids. For added impact, consider experimenting with different hair textures or adding colorful accessories to elevate your Dutch braid to new levels of flair.
Tips to Transition from French to Dutch Braids
Switching from a French braid to a Dutch braid can feel daunting, especially as it requires a subtle mindset shift in how you handle hair sections. Start by familiarizing yourself with the standard technique of each braid. Visually, the Dutch braid will appear to sit on top of the hair while the French braid blends more seamlessly into the scalp. Breaking down your approach can make the transition smoother; perhaps even practice each braid side by side until the differences become second nature. After honing your skills, you’ll find yourself switching between styles effortlessly.
- Practice regularly to gain confidence in both braiding styles.
- Focus on grip – a firm hold helps create a clean finish.
- Be patient, as mastering new techniques takes time and practice.
- Watch video tutorials for visual guidance on the Dutch braid formation.
- Experiment with hair thickness for varied looks.
Transitioning from a French braid to a Dutch braid can feel less intimidating once you recognize the dimensional differences in how the strands are woven together. Instead of just adding hair over the top, you’re bringing it under, which can initially create a sense of tension. If you become comfortable with each variant, you’ll embrace the beauty of mastering both techniques, ultimately enhancing your hairstyling repertoire. After that, your confidence in tackling various braided hairstyles will grow abundantly.
- Watch your positioning – keeping the braid at the right angle aids your grasp.
- Consider using hair ties to hold layers in place without creating tangles.
- Don’t hesitate to seek guidance from friends or stylists with more experience.
- Take your time; quality over speed ensures better results.
- Work with clean, dry hair for the best texture during braiding.
As you embrace the transition from French braids to Dutch braids, refining your technique becomes undeniably rewarding. The detailed understanding of each method sets you up for success as you navigate various styles that may require a nuanced approach. Consistency in practicing will also build your muscle memory, making the braid formation feel more organic. After a while, you’ll find that switching between these stunning braids becomes a seamless integration into your hairstyling routine.
Fishtail Flair: A Charming Twist on Traditional Braids
Detailed Instructions for Fishtail Braids
To start with a fishtail braid, you’ll first want to gather your hair into a low ponytail. Secure it with a hair tie, but ensure it’s loose enough to leave some room for the braid to form. Divide your ponytail into two equal sections. Starting with the right section, take a small piece of hair from the outer edge and cross it over to join the left section. Next, move to the left section and repeat this step by taking a small piece from the outer edge and crossing it over to the right. Continue this alternating pattern until you reach the end of your hair. Make sure to hold the sections firmly but not too tight, allowing the braid to have a relaxed and charming finish.
As you work your way down, you can also adjust the size of your strands based on the look you want. For a more casual appearance, thicker strands create a looser, more bohemian style, whereas thinner strands will yield a tighter and more polished fishtail braid. Finally, secure the end of your fishtail with a small hair tie and gently tug on the sections to puff up the braid for that desired voluminous look.
Unique Variations to Personalize Your Look
Fishtail braids can easily be customized to reflect your personal style. One creative approach is to incorporate colorful hair ties or ribbons into your braid for a fun pop of color that can brighten up any outfit. You can also experiment with the way you part your hair; a deep side part can transform your typical fishtail into a stunning side braid that adds flair to your overall look. Consider adding flowers or decorative pins placed strategically within the braid for an elegant finish perfect for weddings and special occasions.
Another great time to explore variations is during different events; for a boho festival vibe, try a double fishtail braid or combine it with other styles like a crown braid. You might also choose to start the fishtail braid from the nape of your neck for a chic upside-down style. By incorporating some soft waves at the ends, you can bring a romantic touch to your finished product, making it the ideal go-to style for any occasion.
Creative Braiding: The Bohemian Braid and Its Variants
How to Achieve the Effortless Boho Braid
The Bohemian braid exudes an effortless chic vibe, making it a favorite among those who love a relaxed, laid-back style. To start this look, gather your hair into a low ponytail, ensuring it’s free from any harsh partings. Divide the hair into three sections and begin to braid loosely, allowing for a relaxed finish. As you break into the braid, pull small pieces of hair from the sides to create a soft, voluminous appearance—this highlights the whimsical essence of the Boho look. Aim for a relaxed tension, so that the braid doesn’t pull too tightly, which can alter the desired laid-back aesthetic.
Once you reach the end of your braid, secure it with a clear elastic band. For additional texture, gently tug the braid at various points to make it look fuller. You can also consider incorporating either a fishtail or twist braid leading into the main braid to amplify the complexity while maintaining that effortless charm. This method adds depth and intricacy to your hairstyle, making it suitable for both casual outings and festive occasions.
Incorporating Accessories for a Unique Touch
Adding accessories to your Bohemian braid can elevate your hairstyle and provide a personal flair. Utilize materials such as ribbons, flowers, or even small hairpins to enhance the braid’s natural texture. For a worldly feel, consider weaving in a strand of leather or colorful thread—this not only adds visual interest but also reflects your unique style. Floral elements like small fresh or faux blooms can add a romantic touch, making it perfect for weddings or festivals.
By choosing the right accessories, you can easily transform the standard Bohemian braid into something truly your own. For instance, a simple addition of a delicate gold chain wrapped around the braid can turn an everyday look into something captivating. Experiment with various materials and placements; try securing stones or intricate pins at intervals throughout the braid to achieve a more dramatic effect, ensuring your hairstyle stands out in any crowd.
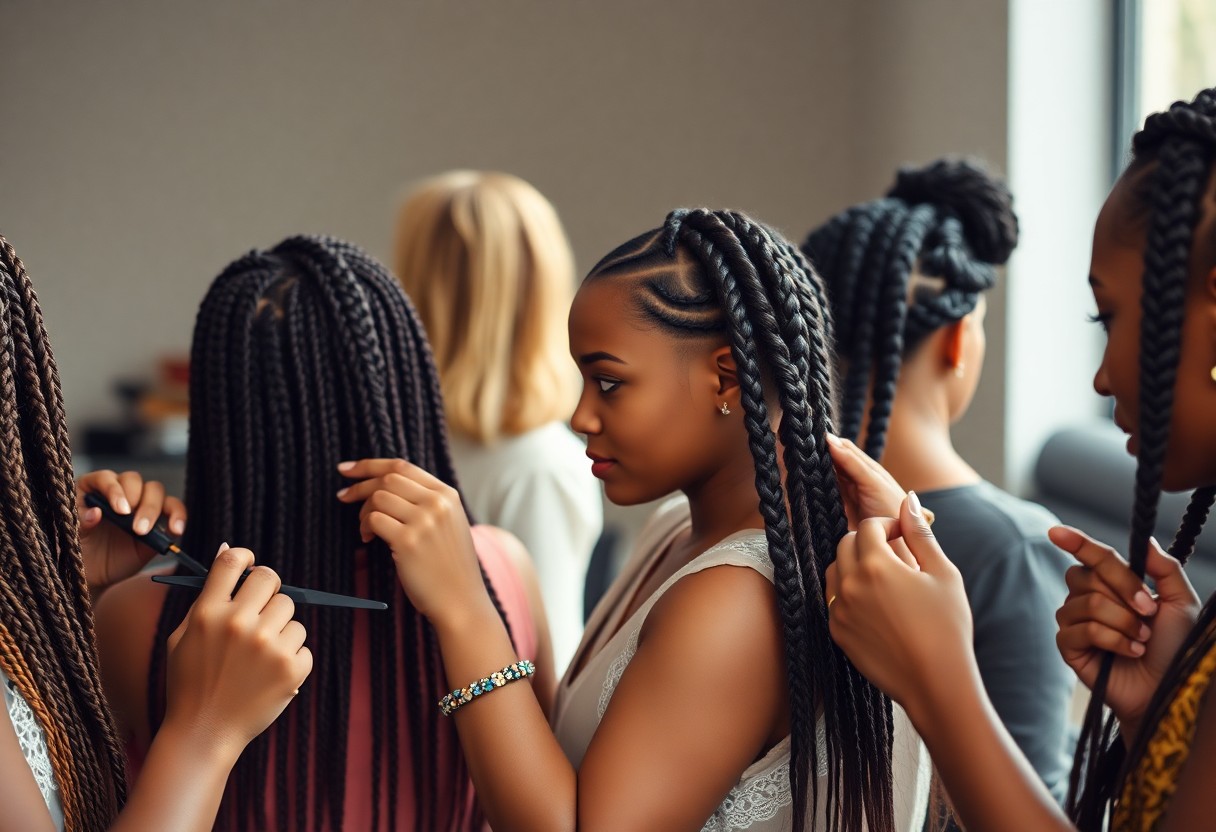
Modern Marvels: Exploring Box Braids and Their Cultural Significance
Step-by-Step Tutorial on Box Braiding
Box braids are not only a stylish choice but also a versatile one that suits various hair types and lengths. Begin by preparing your hair by washing it thoroughly and detangling it with a leave-in conditioner. This will ensure that each section of your hair is smooth and manageable. Once your hair is prepped, gather your materials: hair extensions if desired, hair ties, and a comb.
| Step | Description |
| 1 | Part your hair into manageable sections, typically around 1-inch wide for most box braid styles. |
| 2 | Begin braiding by taking three equal sections of hair and crossing the right section over the middle, then the left over the new middle. |
| 3 | Add extensions if you’re using them by positioning them next to your natural hair and braiding them in simultaneously. |
| 4 | Continue braiding down to your desired length, securing the end with a small elastic band. |
Box braids can offer a unique look while protecting your hair from damage. Each braid should be tight but not so tight that it causes discomfort. Opt to seal the ends with hot water or a sealant to keep your braids looking fresh and neat.
Understanding the Cultural Roots Behind Box Braids
Box braids have deep roots in African history and culture, dating back thousands of years. They serve not only as a protective hairstyle but also as a form of art and expression within various communities. Different styles of braids were often used to signify a person’s age, marital status, or geographical origin. The intricate patterns and methods used in braiding speak to the rich cultural heritage of the African diaspora.
Beyond aesthetics, box braids have led to conversations surrounding identity and representation in the broader context of society. Many individuals recognize the significance of this hairstyle not merely as a fashion choice but as an important link to cultural heritage and personal identity. Celebrities and influencers wearing box braids have propelled the style back into the spotlight, bringing with it a renewed interest in the cultural narratives and significance behind the style.
Braids that Wow: The Halo Braid Experience
Creating a Stunning Halo Braid from Start to Finish
To master the halo braid, start with freshly washed hair to create a clean canvas. If you prefer a bit more hold, consider applying a light mousse to add texture without stiffness. Begin by parting your hair down the center into two equal sections. Take one section and create a simple three-strand braid, securing the end with a hair tie. Repeat this process with the other section. Once your two braids are ready, gently pull on the edges to add volume and loosen them up a bit. The key is to have them appear effortlessly chic but not too messy.
Next, drape one braid over the crown of your head, like a halo, and secure it with bobby pins. Make sure the braid lies flat against your scalp for a comfortable fit. Repeat the process with the second braid, letting it follow the curve of your head and secure it in place. Don’t be afraid to use a few more pins if needed for extra hold, ensuring that the look remains polished. Once secured, lightly pull at sections to create a soft, romantic silhouette—this will enhance the gorgeous aesthetic of your halo braid.
Styling Tips for a Picture-Perfect Finish
The finishing touches can elevate your halo braid from beautiful to breathtaking. Start by using a light hairspray to lock in your style. This will help prevent any flyaways and maintain the crispness of your look throughout the day or evening. For added texture, consider using a texturizing spray or sea salt spray, which can provide an effortlessly tousled effect without overwhelming the braid with products. A light sheen, either from serums or sprays, can give your halo a fresh, glossy finish.
Accessorizing can also play a vital role in enhancing your hairstyle. Floral hairpieces, jeweled pins, or even a silk scarf can add a personal touch and make your halo braid truly unique. Adjust the tightness of your braids to rival any hairstyling competition out there. Your customization choices allow you to express your style brilliantly, ensuring that each crown braid is a statement of your individuality. Perceiving the halo braid as a canvas will encourage creativity as you explore various accessories to complete your look.
- Use a light hairspray to lock in your style.
- Incorporate texturizing spray for effortless texture.
- Accessorize with floral pieces or jeweled pins.
- Adjust braid tightness to personalize the finish.
Beyond Basics: Advanced Braiding Techniques for Beginners
| Technique | Description |
| Ladder Braid | A stunning technique that creates an illusion of cascading loops. |
| Waterfall Braid | Features flowing strands that give a romantic touch to your hairstyle. |
| Fishtail Braid | A unique braiding method that resembles fish bones, creating a textured look. |
| Rope Braid | Twisting two sections of hair together for a spiral effect. |
Introduction to Ladder and Waterfall Braids
Ladder and Waterfall braids represent two of the most visually appealing braid styles you can incorporate into your hairstyling repertoire. Both add depth and movement to your look, making them perfect for special occasions or everyday wear. The Ladder Braid, for example, creates an illusion of elaborate loops cascading down your hair. This technique is not only eye-catching but also versatile, allowing you to play with different hair colors to enhance the depth of the braid.
On the other hand, the Waterfall Braid offers a beautifully romantic aesthetic, where strands of hair cascade down like flowing water. This braid involves dropping sections of hair while braiding, which gives it its distinctive look. As a beginner, you can master these techniques with some practice and focus on the foundational braiding skills, setting the stage for stunning results.
Combining Techniques to Create Unique Styles
Combining different braiding techniques can elevate your hairstyling game and allow for creative expression. For instance, blending a Waterfall braid with a classic French braid creates a striking contrast and a multidimensional look. You could also pair the Fishtail braid with a Ladder effect to produce a braid that stands out in any crowd. This combination not only improves your skills but also broadens your styling options, enabling you to adapt to various occasions, from casual outings to formal gatherings.
By mixing these braiding methods, you can create personalized styles that reflect your individuality. Try experimenting with the thickness of each braid, the number of sections you use, and the overall arrangement of your hair. With a little creativity, you can achieve a truly one-of-a-kind hairstyle that turns heads wherever you go.
Combining various braiding styles opens up a world of creative possibilities, allowing you to design styles that are not only unique but also deeply personal. As you practice these techniques, you’ll discover what works best for your hair type and facial structure, tailoring your approach to suit your aesthetic desires. Embrace your creativity, and don’t hesitate to explore countless combinations to find the perfect braided hairstyle that resonates with your style.
Conclusion
With this in mind, you now have a comprehensive guide to mastering gorgeous braided hairstyles that enhance your look and personal style. By following the step-by-step tutorials, you can easily experiment with various braiding techniques, from simple to intricate designs. As you practice, you’ll gain confidence in your skills and discover new ways to elevate your everyday appearance or prepare for special occasions. Don’t hesitate to mix and match different styles to create unique looks that reflect your individuality.
Ultimately, the beauty of braided hairstyles lies not only in their visual appeal but also in their versatility and ease of styling. As you explore these tutorials, you’ll find that braids can be adapted for any hair type and length, making them suitable for everyone. So gather your tools, unleash your creativity, and enjoy the transformation as you develop your braiding prowess. Your journey in mastering these techniques will undoubtedly lead to stunning results that make you feel empowered and stylish every day.