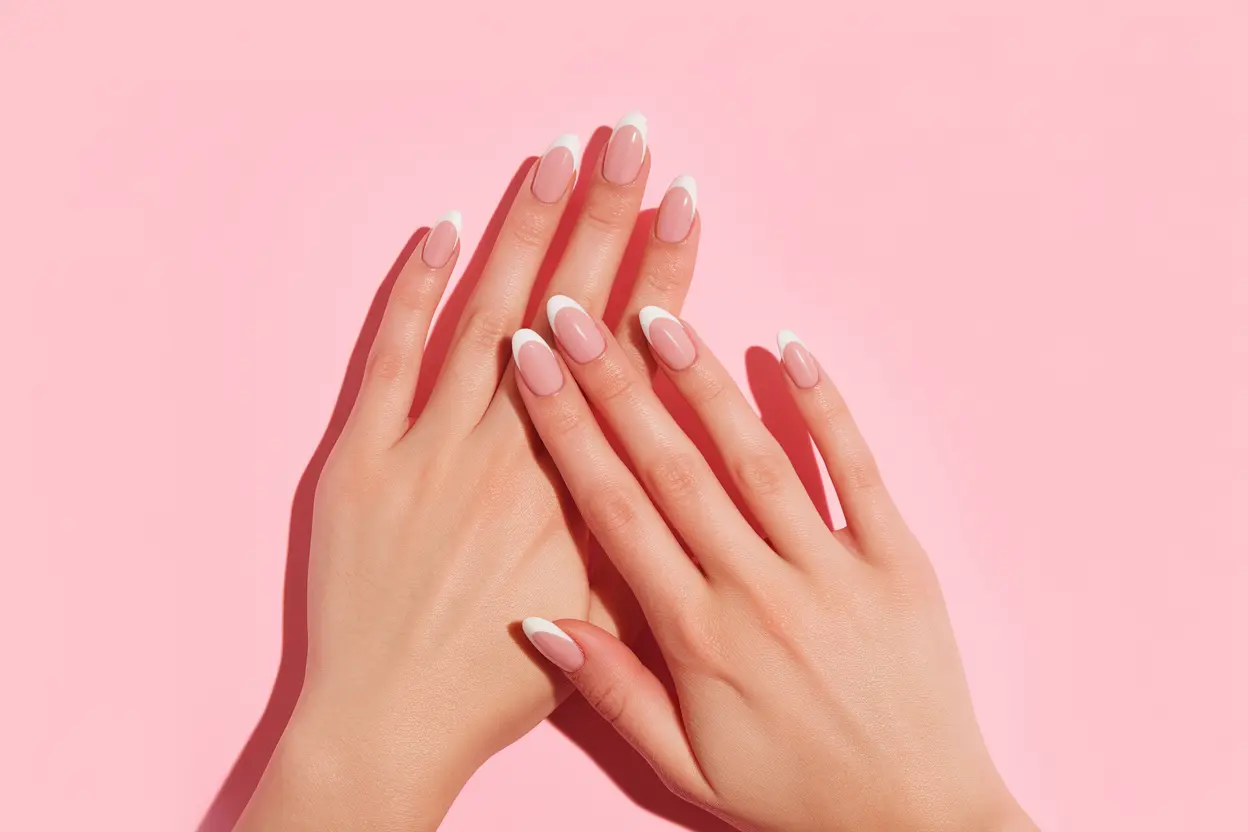
You can achieve salon-quality French tip nails right in the comfort of your home. This step-by-step guide will take you through the crucial tools and techniques needed to create perfectly defined tips without a professional’s help. You’ll learn how to keep your nails healthy and avoid any common mistakes that can lead to a less-than-perfect manicure. Embrace your creativity and enjoy the process, as you enhance your nails with this classic style that suits any occasion.
The Essential Tools for DIY French Tips
Creating stunning DIY French tip nails requires some specific tools to ensure a flawless finish. Having the right tools makes the process smoother and can elevate the final look of your manicure. Essential tools you should gather include the following:
- Nail Polish in Base Coat
- White Nail Polish
- Top Coat
- Nail Art Tape or Striping Brush
- Precision Brush
- Nail Files
- Cuticle Oil
After collecting these items, you’re well on your way to achieving that beautiful, salon-quality French tip look at home. The combination of these tools allows for precision and creativity in your designs, and they are all relatively easy to use, even for beginners.
Must-Have Nail Products
Opting for high-quality nail products is vital for a professional looking French tip. The base coat protects your nails while prolonging the life of your manicure, so don’t skip it. You’ll want to select a sharp, opaque white polish, as it forms the foundation of the classic French tip. The top coat seals the design and adds a glossy finish, which not only looks great but also incorporates durability against chips and scratches. Additionally, using an *organic* or *toxic-free polish* can make a significant difference for both the appearance of your nails and your overall health.
Consider investing in nail art tape or a striping brush. These allow for crisp lines that will keep your polish neat and help achieve that iconic French tip shape. A precision brush can also be a game-changer for those intricate or detailed designs. Nail files and cuticle oil promote healthy nails and cuticles, so include these in your toolkit for an all-around manicure experience.
Healthier Alternatives for Nail Care
When pampering your nails, opting for healthier alternatives provides long-term benefits. Look for *non-toxic* nail polishes free of harmful chemicals like formaldehyde, toluene, and dibutyl phthalate (DBP), which can contribute to nail damage and toxicity. Brands like Zoya and Essie offer vibrant colors while prioritizing nail health, making them excellent choices for your DIY French tip manicures. You might also consider hydrating and nourishing your cuticles with natural oils such as jojoba or vitamin E, as they promote cell regeneration and keep your cuticles looking neat.
Additionally, maintaining a balanced diet full of vitamins and minerals contributes to strong nails. Incorporate foods rich in biotin, such as eggs, nuts, and sweet potatoes, to support nail growth and strength. Drinking plenty of water also plays a vital role in keeping your nails hydrated from the inside out. By following these healthier alternatives, you ensure your DIY French tips not only look stunning but also promote the overall health of your nails.
Mastering the Basics: Nail Preparation Techniques
Optimal Nail Shaping and Smoothing
Achieving the perfect base for your French tip nails starts with shaping and smoothing your nails. Begin by choosing a nail shape that best suits your fingers; common options include almond, square, and stiletto. Use a high-quality nail file, and gently shape the edges to your desired form. For an even smoother surface, consider buffing your nails with a buffer block, which helps remove ridges and imperfections, providing a polished look. A smooth nail surface ensures that the polish applies evenly and lasts longer.
As you shape your nails, be mindful of the length; a refined length not only looks elegant but also prevents breakage during the application process. After filing, wash your hands to remove any dust and then use a cuticle pusher to gently push back your cuticles. This not only enhances the overall appearance of your nails but also creates a cleaner edge for your base and tip colors, making your DIY French tips look even more professional.
The Importance of Base Coats: Protect and Perfect
A quality base coat lays the foundation for your French tip nails. Applying a base coat provides a protective barrier between your natural nails and the polish, preventing staining and damage that can occur over time. It also helps to extend the longevity of your manicure by creating a tacky surface that allows subsequent polish layers to adhere better. When choosing a base coat, opt for one that suits your nail type; some are formulated to strengthen thin nails, while others are transparent and ideal for any polish application.
A base coat can also enhance the color of your polish, ensuring that the true shade shines through. For example, using a sheer nude base coat can provide a nice canvas for white tips, making them appear more vibrant and crisp. Different formulations, like ridge fillers or matte base coats, can serve various purposes depending on your specific needs, adding versatility to your nail care regimen and ensuring a stunning finish.
In addition to protection, base coats can sometimes contain nourishing ingredients that benefit the health of your nails. Ingredients like vitamin E and various botanical extracts can help strengthen your nails over time, making them less prone to breakage and chipping. By investing in a quality base coat, you not only improve the appearance of your DIY French tips but also contribute to long-term nail health, making it a worthwhile step in your manicure routine.
Polish Application Strategy: The Art of French Tips
Create the perfect base by painting your entire nail with a solid color that resonates with your style. Begin with a coat of a neutral shade, which serves as the canvas for your French tips. Allow this base layer to dry completely before moving on to the fun part. Apply a second coat if necessary to ensure opacity, especially if you choose a paler hue that needs enhancement for a more polished look.
- Start at the cuticle and apply in three strokes for even coverage.
- Ensure the brush is slightly angled before creating the tips.
- Work quickly but patiently to avoid smudging.
- Allow each layer to dry completely before proceeding.
The application process also requires precision, especially when it comes to drawing those iconic tip lines. Therefore, as you advance into painting the tips, hold your brush at a slight angle which results in a smoother, cleaner application. Consider a thicker tip for a bolder look, or a thinner one for something more subtle yet equally elegant. Thou must always keep your hand steady for precision!
Tipping Techniques: Clean Line Accuracy
Achieving clean lines is the hallmark of a successful DIY French tip manicure. The technique you use to create these lines can make a significant difference in the overall appearance of your nails. Begin with your dominant hand and gently guide the brush towards the tip of the nail, creating a smooth arc. For your non-dominant hand, it may help to stabilize your hand by resting your elbow on a flat surface while you work. This tiny shift can help you gain control over your strokes, reducing the likelihood of wobbly lines.
Using nail tape can also be a game changer. If steady handwork doesn’t come naturally to you, try placing small pieces of tape along the lines you wish to paint over. This way, you can peel the tape off afterward for cleaner, more professional-looking tips. Whichever method you choose, be patient with the process—practice makes perfect in achieving that nail salon quality at home.
Color Choices and Their Impact on Aesthetics
Your color palette can dramatically alter the mood of your manicure, making the choice of shades a significant aspect of your French tip design. Traditional white tips offer a classic and elegant look suitable for any occasion, while opting for bolder colors, such as black or metallic shades, can lend an edgy vibe. Experimenting with contrasting hues can vastly increase visual interest, especially during seasonal events or celebrations. You might select soft pastels for spring or rich jewel tones for winter festivities to align your nails with the seasons.
Moreover, the finish of your chosen colors also plays a role; a glossy finish can elevate the chicness of a simple white tip, while a matte topcoat can provide a contemporary twist. Always keep in mind the significance of balance when selecting your colors—if your base is busy, a calmer tip color might work better, and vice versa. Ultimately, your nail color choices are not merely about aesthetics; they express your personality and style, allowing for endless creativity in the French tip realm! Thou can confidently mix and match until you find the perfect combination that resonates with you.
Enhancing Your Manicure: Top Coats and Finishing Touches
The Role of Top Coats in Longevity and Shine
Applying a high-quality top coat is a game changer for your DIY French tip manicure. A good top coat not only enhances the longevity of your polish, helping it withstand chips and fading for days or even weeks, but it also adds a beautiful shine that elevates the entire look. Opt for a gel-like top coat if you desire an ultra-smooth finish; these products usually cure under UV light or air-dry to a high-gloss finish, giving your nails that coveted salon effect at home. Moreover, some top coats even have components that can help protect your nails from the damaging effects of UV rays, adding another layer of defense while keeping your mani looking fresh.
Your choice of top coat can also impact the drying time of your manicure. Fast-drying options are excellent for those who are impatient or busy, as they create a quick, hard layer on top of your nail polish without compromising quality. However, if you’re looking for something that offers additional benefits, consider top coats that claim to strengthen nails or include nourishing ingredients like vitamins and oils. These can help ensure that while your manicure shines, your nails remain healthy and strong over time.
Adding Designs and Nail Art for Personal Flair
Elevate your French tip nails by incorporating a touch of your unique style through designs and nail art. Simple techniques such as polka dots, stripes, or even delicate floral patterns can create a stunning contrast against the classic French tip look. For example, using a fine brush, you can draw intricate designs along the tip or base of your nail, adding an artsy vibe. Nail stickers are another excellent option: they come in myriad designs and are easy to apply, allowing you to customize your nails without the need for extensive practice.
You might want to consider seasonal motifs or color themes that resonate with your outfit or mood. Accent nails help you achieve a standout look without needing to decorate every finger, so select one or two to showcase a more elaborate design. Feel free to experiment with gradients or ombre effects to add depth to your manicure; this will keep your look fresh and engaging while still honoring the timeless charm of the French tip.
Nail art doesn’t have to be limited to intricate detailing—color blocking, geometric patterns, or even a few strategic embellishments like rhinestones can add visual interest. Another idea is to play with textures—matte finishes paired with glossy tips or chrome accents can create unique contrasts that set your nails apart. The beauty of DIY nail art lies in the freedom it offers to express your personality; every finish you apply allows you to tell your creative story.
Troubleshooting Common Mistakes: Achieving Flawless French Tips
Despite the best intentions, mistakes can happen during your DIY French manicure. Thankfully, most issues are simple to fix with just a little patience and some insightful techniques. Common pitfalls include uneven lines, smudging, or the polish not adhering properly, which can detract from the overall aesthetics of your freshly painted nails. The key to achieving that perfect French tip look lies in precision and finesse, so when things go a bit awry, don’t despair. Here are a few pointers to help ensure yours are always on point:
- Use tape or stencils for cleaner lines
- Apply thin coats to avoid smudging
- Practice steady hand skills for precision
- Utilize a small detail brush for touch-ups
- Be patient with drying times to avoid accidental marks
After you have tackled your hiccups, the goal is to have flawless results that showcase your hard work. For those unfortunate ‘oops moments,’ you might need to make some adjustments to your tips. A steady hand and a little creativity can allow you to rescue an uneven line or a smudge caused by an unexpected contact. To correct uneven lines, a small detail brush dipped in the base color can help you to finesse the edges. You can also gently use a nail polish remover with a fine-tip applicator to clean up any stray polish without ruining your entire manicure.
Fixing Uneven Lines and Oops Moments
Our hands can be tricky, so don’t get discouraged if your lines aren’t as crisp as you’d hoped. A secret weapon in fixing uneven lines is using a fine-tipped nail art brush. Dip it into your base color and carefully trace along the edge of your French tip where the line is jagged, creating a cleaner look. For those accidental smudges, a bit of nail polish remover on a small brush, carefully applied, can help you erase mistakes without having to redo your entire manicure.
Stepping into the domain of nail care will not only preserve your fresh French tips but also protect the health of your nails for the long run. Post-manicure care is often neglected but is vital for maintaining both aesthetic and structural integrity. Applying a top coat regularly keeps the color vibrant and protects against chips and scratches. Beyond that, consider using cuticle oil or a moisturizing hand cream to nourish your nails and surrounding skin.
Nail Care After Your Manicure: Prolonging Perfection
Keeping your French tips looking salon-fresh requires a little TLC. Moisturizing is key, as dry cuticles can lead to hangnails and chipped polish. Opt for a quality cuticle oil and apply it daily to keep them soft and hydrated. It’s not just about the polish but nurturing the nails underneath. Regularly buffing your nails can also lead to smoother surfaces and help the polish adhere better over time. Remember to avoid excessive exposure to water, especially in the first 24 hours post-manicure, as this can compromise the longevity of your polish.
After your manicure, taking time to indulge in nail care will extend the life of your polish and keep your nails looking healthy. Make it a habit to wear gloves when cleaning or doing dishes to protect against wear and tear. Regularly maintain your nail health by scheduling manicures every two weeks or doing touch-ups to keep those tips looking sharp and chic.
Final Words
The DIY French tip nails you’ve learned to create are not only a classic choice but also an easy way to elevate your at-home manicure game. With the right tools and a little practice, you can achieve salon-quality results right from the comfort of your own home. By following the step-by-step guide, you can customize your French tips to match any occasion, adding a personal touch that reflects your unique style.
As you refine your technique, don’t hesitate to experiment with colors and designs that resonate with your aesthetic. Keep in mind that perfecting your technique takes time, so be patient and enjoy the process. Your newly polished French tip nails will not only enhance your appearance but also boost your confidence, empowering you to showcase your creativity and skills. Happy manicuring!