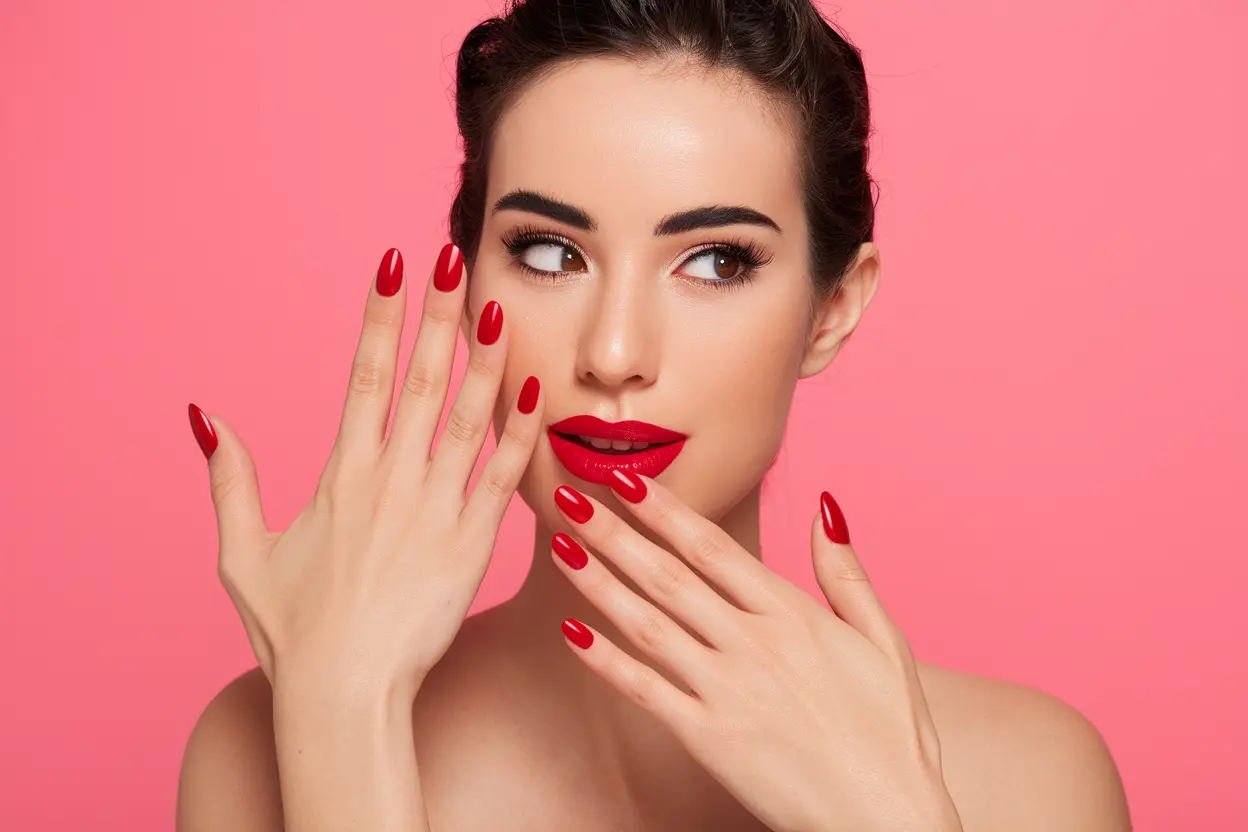
Beauty enthusiasts know that the perfect red nail can elevate your entire look, exuding confidence and sophistication. To help you achieve this timeless style, we’ll explore vital tips and techniques that ensure flawless hands. From choosing the right shade to mastering application and maintenance, you’ll discover how to showcase your nails in a way that captures attention and complements your personal style. Get ready to impress with a stunning red manicure that reflects your unique flair!
The Foundation: Preparing Your Nails for Perfection
Achieving the perfect red nail look starts with a solid foundation. A thorough preparation process ensures that your nails are ready to hold the color beautifully, while also promoting long-lasting wear. When you invest time into prepping your nails correctly, you not only enhance the appearance of your manicure but also improve the health of your nails in the long run. This phase involves careful assessment and the right tools to create a pristine canvas for your bold shade.
Assessing Nail Health: The Essential Checklist
Your journey to flawless red nails begins with an assessment of your nail health. Look for any signs of damage such as chips, cracks, or peeling skin around the cuticles. These imperfections can detract from the overall aesthetics of your manicure. Ensure your nails are free of any excessive polish buildup or lingering residue that could impede the new color application. A good rule of thumb is to adopt a weekly nail care routine that includes hydrating your cuticles and moisturizing your hands to maintain optimal health and appearance.
Additionally, check for any signs of fungal infections or discoloration, as these can affect not only the way your polish looks but also your overall nail health. If you notice anything unusual, consider consulting a dermatologist or nail specialist before proceeding with your manicure. Prioritizing nail health will not only enhance the longevity of your manicure but will also give you the confidence of knowing your nails are in great shape.
Essential Tools: Must-Have Items for Flawless Application
Equipping yourself with the right tools can elevate your nail prep game to new heights. Start with a high-quality nail file, cuticle remover, and buffer to ensure that your nails are shaped and smooth. A thorough cleaning and shaping process minimizes imperfections and enhances polish adherence. Don’t overlook the importance of a good base coat, as this not only protects your natural nails but also provides a smooth surface for your polish. Investing in a reliable top coat is equally important, as it seals in your color and adds that glossy finish.
Alongside these imperatives, consider having a good pair of cuticle scissors, a nail clipper, and a gentle scrub brush for cleaning your nails properly. Each tool serves its purpose in creating the perfect red nail look, and having them on hand streamlines your preparation process. For instance, a flexible buffer can help achieve a seamless finish before applying your base coat, while a quality cuticle oil nourishes your nails and enhances their appearance, making your red polish pop. Well-prepped nails not only look gorgeous but also lead to increased resilience against chipping and fading, ensuring your manicure stays flawless for days on end.
The Art of Color Selection: Finding Your Perfect Red
Skin Tone Matters: Choosing the Right Shade
Your skin tone plays a significant role in determining which red polish will look best on you. Those with warm undertones tend to shine in shades like coral reds or warm cherry tones that enhance the natural glow of your complexion. If your skin has a cool undertone, opt for deeper hues like berry or blue-toned reds, which contrast beautifully with cooler skin tones and make your hands pop. For those with neutral undertones, the world of red is your oyster; nearly any shade will complement your balanced skin tone.
Swatch test is where the magic happens. Apply a few shades of red on your nails and take a moment to step back and examine how they interact with your skin’s tone. A red polish that might look fabulous on someone else can vary drastically against your unique skin, making this step imperative. Also, consider the intensity of each shade and its finish—glossy reds can appear bolder, while muted or matte finishes may create a more subtle look.
Seasonal Trends: Which Reds Are In Right Now?
Trends in nail color shift with the seasons, and red is no exception. As we transition through the year, different reds come into play. In fall, for instance, rich, darker reds like merlot or oxblood dominate the scene, complementing the cozy vibes and fashion of the season. Conversely, spring and summer call for brighter, coral-infused reds that reflect the liveliness of blooming flowers and sunshine.
Current seasonal trends heavily favor shades that fuse classic elegance with modern twists. For this autumn, look for reds infused with deep burgundy or even hints of gold shimmer, giving your nails a sophisticated yet festive flair. As the year shifts to spring, pastel reds that bring a touch of softness to your look will be in vogue, while summer often revives vibrant, tropical shades. Keeping an eye on runway trends can give you inspiration on what reds to sport during each season.
Mastering Application Techniques: Steps for a Professional Finish
Achieving that runway-ready red nail look hinges significantly on your application technique. A professional finish is less about expensive products and more about executing the right steps methodically. Start with a base coat to fortify your nails against staining and create an even surface for your nail polish. Allowing adequate drying time between each step is just as important as the paint itself—rushing through can lead to smudges or chip away at your hard work. Focus on applying the polish in smooth strokes, allowing the brush to naturally curve along the nail edge. This attention to detail ensures a clean, professional appearance.
The Three-C Layering Method: Optimal Coverage
The Three-C Layering Method serves as an imperative technique for achieving optimal color saturation and a luxurious finish. It involves applying three distinct coats of polish: a base coat, followed by two layers of your chosen red nail polish. Each layer should be thin but complete, avoiding glob formation. Start with a light application, ensuring that it fully covers the nail without any missed spots. Allow each coat to dry thoroughly—approximately 2 to 5 minutes depending on humidity and polish thickness—before adding the next. This method not only enhances the color intensity but also ensures durability for your stunning red nails.
Cuticle Care: Techniques for a Clean and Polished Look
Incorporating proper cuticle care into your nail routine helps create a refined, polished look that elevates your red nails. Start by gently pushing back your cuticles after a warm soak; this makes them more pliable. Avoid cutting cuticles, as this can lead to infections or unsightly regrowth. Instead, consider using a cuticle remover or oil to soften the skin and provide hydration. Afterward, apply your base coat, ensuring to maneuver the brush slightly over the cuticle area without painting on the skin—this technique gives your nails the appearance of longer, elegantly shaped digits.
Focusing on cuticle care not only contributes to the overall elegance of your nail aesthetic but also prevents unsightly lifting and chipping of your nail polish. A well-maintained cuticle can make an impressive difference in how well your polish adheres, keeping your red nails vibrant and flawless for days on end. Regular maintenance ensures that your hands remain looking their best, making the manicure experience not just a one-time task, but an ongoing pledge to beautiful nails.
Pro Tips for Longevity: Keeping Your Red Nails Flawless
Achieving that perfect red nail look isn’t just about the application; it’s also about ensuring your manicure lasts as long as possible. One of the most effective ways to prolong the life of your manicure is by investing time in the preparation and application stages. Start by keeping your nails trimmed and shaped to your desired length, and take time to gently buff the surface. Before you start applying your red polish, a base coat is a must, as it will create a barrier between your nail and the pigmented lacquer, preventing any discoloration. For best results, always seal your manicure with a topcoat to give it that extra layer of protection.
- Skip risky activities that could chip your polish, like opening cans or heavy lifting.
- Apply a fresh coat of topcoat every few days to combat chips and maintain shine.
- Avoid prolonged exposure to water which can weaken your polish.
- Keep your hands hydrated to avoid dryness and peeling around your nails.
- Choose high-quality products designed for long wear to minimize chips and fading.
Top Coats: The Secret to Glossy and Durable Results
A top coat is your secret weapon when it comes to achieving glossy, long-lasting nails. After applying your favorite red polish, ensure you layer on a high-quality top coat. This protective layer not only enhances the shine of your polish but also acts as a shield against chipping and wear. Consider using a quick-drying top coat if you’re in a rush; it cures faster, allowing you to get back to your day.
Many brands offer specialized top coats that focus on added benefits such as shine amplification or UV protection, which helps to maintain that vibrant red hue against fading. Applying a top coat too close to the edges or cuticles can create lifting, so always be precise and ensure the entire surface is well-coated from tip to base.
Maintenance: Best Practices for Extended Wear
To keep your red nails looking fresh, maintaining them throughout the week is imperative. Start by avoiding harsh chemicals and cleaning products that can weaken your manicure. Use gloves while washing dishes or using cleaning agents to minimize damage. When you apply lotion, take a moment to massage your cuticles and nails; this not only nourishes but also keeps your manicure intact.
Regular touch-ups will help mitigate wear. If you spot any chips, a quick fix is as easy as applying a tiny drop of polish to the affected area and sealing with top coat. Try to avoid any activities that may chip your polish during the initial days of application, as this is when it’s most vulnerable.
Recognizing the signs of wear early can save you from having to redo the entire manicure, allowing you to maintain that gorgeous red look for longer.
Troubleshooting Common Issues: Avoiding Nail Disasters
Bubbling and Blemishes: Causes and Solutions
Bubbles and blemishes on your flawless red nails can be incredibly frustrating, but understanding their origins can help you prevent them. Often, these imperfections result from applying nail polish too thickly or from not allowing sufficient drying time between layers. If your base coat or previous polish layer isn’t completely dry, applying additional coats can trap air bubbles beneath the surface, leading to unsightly bumps. Another common cause is using old or improperly stored polish, which can thicken and lose its consistency, contributing to an uneven application.
To combat bubbling and blemishes, aim for thinner coats of polish and allow each layer to dry thoroughly before adding the next. If you’re dealing with particularly stubborn bubbles, gently smooth the surface with a fine nail file once the polish is fully dry, and apply a top coat to mask the imperfections. Also, investing in high-quality, well-stored nail polish can make a noticeable difference in achieving that flawless finish.
Chipped or Faded Color: How to Fix and Prevent
Chipping or fading of your red nail polish can be disheartening, especially after putting in the effort for a polished look. Chipping often happens due to daily activities and neglecting to seal your color with a top coat. Activities such as typing, dishwashing, or even minor impacts can cause your polish to wear away. In terms of fading, certain polishes lose their vibrancy due to sun exposure or simply aging on your nails.
To prevent chips, always start with a base coat to protect your nail bed and enhance polish adhesion. Regularly apply a top coat every few days to reinforce the color and extend its life. If you notice chipping has already occurred, use a touch-up method by applying a little polish directly to the chip and sealing it with a new layer of top coat. Ensuring you’re applying nail polish in a cool, dry environment also helps, as heat and humidity can exacerbate chipping issues, keeping your red nails looking fabulous for longer.
Summing up
Ultimately, achieving the perfect red nail look requires a combination of the right techniques and quality products tailored to your unique needs. By preparing your nails properly, selecting a shade that complements your skin tone, and applying a top-notch base and top coat, you can elevate your manicure to professional levels. Always ensure you maintain your nails between applications by practicing good care routines, which can profoundly impact the longevity and appearance of your color.
You also have the opportunity to experiment with various finishes, designs, and embellishments to make your red nails a true reflection of your style. By staying informed about new trends and techniques, you empower yourself to master the art of flawless hands. Embrace the confidence that comes with stunning nails, and let your red manicure be a statement of your personal aesthetic.