It’s time to elevate your nail game this Easter with some vibrant and festive designs! In this post, you will discover easy-to-follow tutorials that are perfect for beginners, allowing you to unleash your creativity. We will guide you through step-by-step instructions to create charming nail art that will impress your friends and family. With a few simple materials and techniques, you’ll be ready to showcase your unique style and celebrate the season with beautiful nails. Let’s get started on your DIY Easter nail art journey!
Essential Tools for DIY Nail Art Success
Must-Have Nail Art Supplies
To initiate on your DIY Easter nail art journey, assembling the right toolkit is important. Your supply list should include a variety of nail brushes for precision work, dotting tools for intricate designs, and striping tape to help create clean lines. Invest in a set of nail art stickers and templates to save time on complicated designs, especially when you’re just starting. Acquiring a top coat will not only give your artwork a professional finish but also enhance the durability of your designs against chipping.
Don’t overlook the importance of basic items like a high-quality base coat, nail file, and cuticle pusher. These tools help prepare your nails and ensure that your nail art adheres well. Keeping a lint-free cloth and nail polish remover handy for any cleanup during your creative process will save you from frustration and allow you to maintain a neat workspace while you bring your festive visions to life.
Choosing Quality Nail Polishes
The selection of nail polish can significantly impact your Easter nail art outcomes. Opt for brands that are known for their pigmentation and consistency, as these will provide better coverage with fewer coats. Look for polishes that are labeled as fast-drying to minimize downtime between layers, which can be crucial when you’re stacking multiple colors or designs. Additionally, consider investing in polishes with a thicker formula, as they can often lead to more vibrant designs and smoother application.
Avoid low-quality or overly cheap options, which can result in uneven finishes and chips that diminish your hard work. Popular brands often offer mini kits tailored for nail art enthusiasts, allowing you to experiment with different colors and techniques before committing to larger bottles. For special designs, like glitter or matte finishes, select those that are easy to apply and remove, ensuring hassle-free creativity.
The Art of Base Coats: Setting the Stage
Importance of Nail Preparation
Before you probe creating intricate designs, the foundation of your nail art lies in effective nail preparation. Well-prepared nails promote better polish adherence, ensuring that your vibrant Easter designs don’t chip or fade prematurely. By starting with clean nails, free from oils, dirt, and old polish, you create an optimal surface for the base coat and subsequent layers. A simple wipe with nail polish remover can do wonders in eliminating any remnants that could hinder the polish from bonding effectively.
Additionally, the health of your nails plays a significant role in the final outcome. Regular maintenance such as trimming, filing, and moisturizing your cuticles not only enhances the overall look of your nails but aids in smoother application. You want your nail art to shine, and investing a bit of time in prepping your nails will undoubtedly set the stage for success.
Best Base Coat Techniques for Lasting Effects
Applying a base coat serves as an excellent primer that creates a barrier between your nails and colored polish, reducing the risk of staining and damage. Opting for a high-quality base coat can significantly improve your nail art’s longevity. To apply, use thin, even strokes and allow sufficient drying time for the best results. This method prevents bubbles from forming and ensures an even base for your colors.
An effective technique also involves sealing the edges of your nails by slightly wrapping the base coat around the tips. This practice not only strengthens the base but also helps to prevent chipping. For shadows and gradients, applying two thinner layers of your base coat instead of one thick layer enhances the smoothness and provides even coverage.
Experimenting with different base coats can also lead to exciting discoveries. Look for options infused with strengthening components like keratin or vitamins, which can bolster your nail health while providing a smooth base. Try a base coat that gives a glossy finish if you are after a shiny look, or opt for a matte variant to create a different effect that complements your designs. Taking the time to find the perfect base coat technique elevates your DIY Easter nail art to a salon-quality level, allowing your creativity to flourish without compromise.
Mastering Simple Designs: Step-by-Step Tutorials
With a solid base coat applied, you’re ready to research into some simple yet eye-catching designs that will make your nails shine this Easter. These tutorials are perfect for anyone eager to express their creativity without overwhelming themselves. Below, you’ll find a concise guide to creating classic Easter egg patterns and delightful floral motifs—two staples of the season. Your nails are about to become stunning works of art.
| Design | Tools Needed |
|---|---|
| Classic Easter Egg Patterns | Nail polish, dotting tools, striping tape |
| Floral Motifs for a Spring Touch | Nail polish, nail brushes, small sponge |
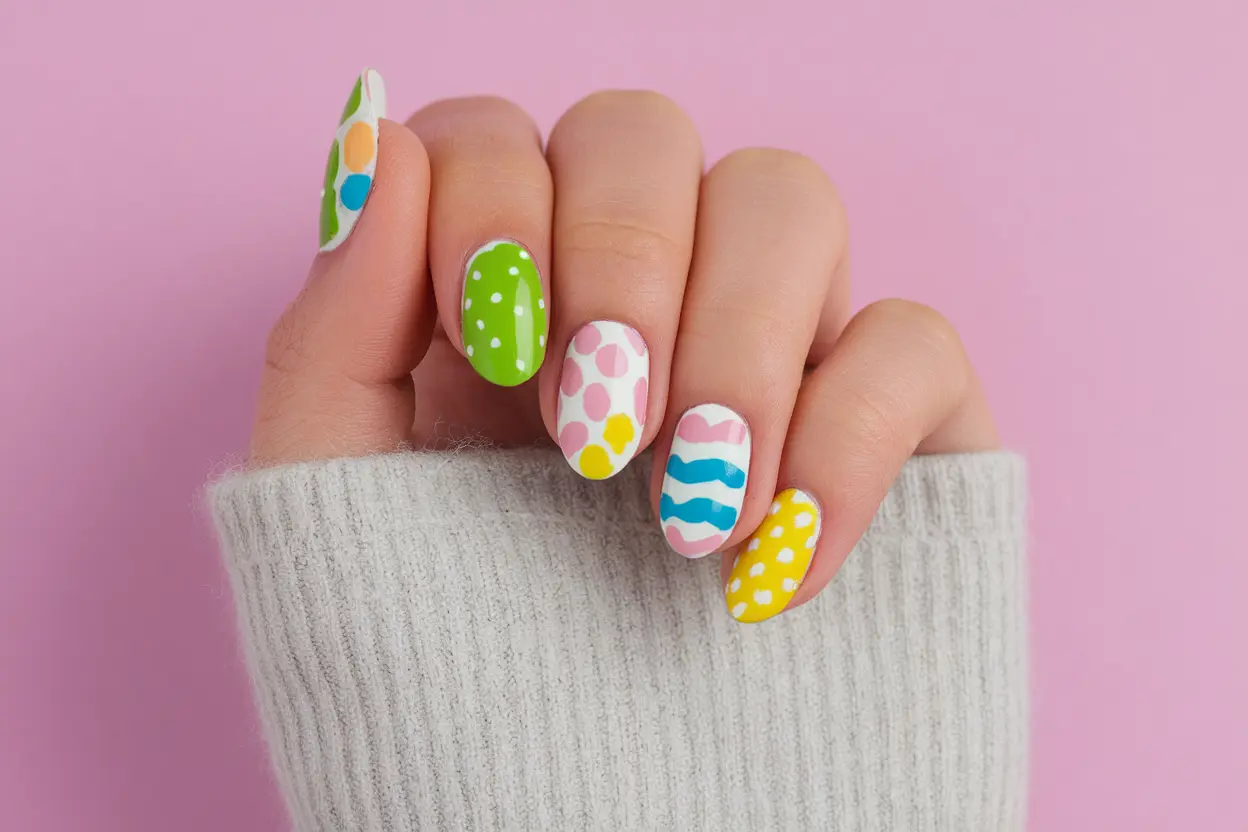
Classic Easter Egg Patterns
To start crafting your classic Easter egg designs, choose vibrant colors that represent the holiday. Begin by applying a base color; pastel shades like baby blue, pink, or mint green work wonderfully. Once the base coat is dry, use a dotting tool or a thin paintbrush to create various patterns like stripes, polka dots, and zigzags across the surface. Layer your designs, mixing and matching colors to embody the essence of decorated Easter eggs—it’s all about creativity!
For added dimension, consider using metallic or glitter polish as a top coat to give that festive sheen. As a tip, practicing your patterns on a piece of paper first can help build your confidence before applying directly to your nails. You can even try out some simpler designs on your toes for a cute matching set! Enjoy the process and allow your designs to reflect your personal style.
Floral Motifs for a Spring Touch
Floral motifs can add a fresh and vibrant touch to your Easter nail art. Start with a pastel or white base for a clean canvas, which will make the colors of your florals pop beautifully. Using a fine brush or a dotting tool, create small blossoms in shades of yellow, pink, and lavender. Start with a central dot and build petals around it for a three-dimensional look. A light topcoat will give your flowers a smooth finish and enhance their visibility.
Consider integrating leaves or vines around the flowers for added detail—this can be achieved simply with green polish and a steady hand. This technique not only captures the beauty of blooming flowers but also symbolizes the season of renewal that accompanies Easter. Personal touches like varying the size and style of flowers will make your nail art unique!
Diving deeper into floral motifs, you might also like to experiment with techniques like sponging or stamping to make your designs more dynamic. Utilizing a sponge can create a gorgeous gradient effect, while stamping kits can provide intricate flower designs with minimal effort. Let your creativity flow and enjoy the chance to bring a burst of spring to your fingertips this Easter!
Advanced Techniques for Creative Expression
Exploring advanced nail art techniques adds depth and personality to your Easter designs. With your newfound skills, consider plunging into stamping, freehand art, and the incorporation of 3D elements. Each technique offers unique opportunities for creativity and expression in your nail designs, allowing you to personalize your Easter look even further.
The following table provides an overview of advanced techniques along with brief descriptions:
| Technique | Description |
|---|---|
| Stamping | Using specially designed plates and a stamping tool to create intricate designs quickly. |
| Freehand Nail Art | Brushing painting techniques to create unique, custom designs. |
| Incorporating 3D Elements | Adding charms, rhinestones, or other embellishments for a textured finish. |
Stamping and Freehand Nail Art
Stamping is an effective way to add intricate designs to your Easter nails. With a stamping kit containing a plate and scraper, you can transfer detailed patterns onto your nails effortlessly. To begin, apply a base coat, followed by your desired polish color. Once dry, use a contrasting color to color in the design on the plate, scrape off the excess polish, and press the stamper onto the plate and then onto your nail. The results can be stunning, transforming your nails into a work of art within minutes.
Freehand nail art allows you to showcase your creativity. Use fine-tipped brushes or nail art pens to paint designs directly onto your nails. Easter themes can include eggs, bunnies, or floral patterns. This technique gives you freedom and encourages experimentation with colors and designs; even if you’re a beginner, layering colors and practicing various strokes can yield remarkable results over time.
Incorporating 3D Elements
Adding 3D elements to your nail art can take your Easter designs to the next level. Utilizing stickers, jewelry, or nail gems can create a unique, standout look that captures attention. For example, embellishing an egg design with tiny beads can mimic the texture of a real egg or flower charms can add depth and interest. These elements can be adhered with topcoat or nail glue, ensuring they stay in place while maintaining a seamless look.
Consider the balance of your design when incorporating 3D elements. Too many embellishments can overwhelm your base design, while just the right amount enhances your creativity without causing clutter. Utilize your skills developed in stamping and freehand techniques to create a strong backdrop for your 3D pieces, ensuring the whole look is cohesive and visually appealing. Pay attention to how colors and textures interact, and remember that less can be more when it comes to achieving an elegant yet festive nail art style.
Maintaining and Caring for Your Nail Art
To keep your DIY Easter nail art looking fresh and vibrant, a few steps can enhance its longevity while protecting your hard work. Your nails are constantly exposed to elements that can chip away at the design, making it imperative to incorporate good practices into your routine. One way to improve durability is to apply a high-quality top coat regularly. This clear layer not only seals your artwork but also gives it a shiny finish that stands out. Coupling that with avoiding harsh chemicals when cleaning can significantly extend the life of your nail art. Remember to moisturize your cuticles as well; this helps maintain healthy nails that support vibrant designs.
Tips for Longevity and Protection
Utilizing proper techniques during application will also boost the resilience of your designs. Here are some imperative tips:
- Use a quality base coat before painting your nails.
- Seal your art with a top coat every few days for extra protection.
- Avoid soaking your hands in water for prolonged periods.
- Wear gloves while doing household chores to shield your nails.
- Avoid using your nails as tools to prevent accidental chips.
Perceiving these best practices will keep your designs looking Easter fresh for longer, allowing you to enjoy your festive styles much more.
Safe Removal Techniques
When it comes time to switch up your nail art or just require a fresh start, removing your designs correctly is as vital as applying them. Harsh chemicals can damage the nail bed and surrounding skin if not done carefully. Opting for gentle, non-acetone nail polish removers is a safer option. Soak a cotton ball with the remover, place it on your nail, and wrap it with aluminum foil for about 10-15 minutes. This allows the formula to penetrate the nail polish, softening it and making it easier to wipe away without excessive scrubbing. This approach minimizes the risk of harm while ensuring a smooth transition from one nail design to another.
The process should include avoiding any aggressive scraping or force, which can weaken your nails over time. After removal, ensure you nourish your nails and cuticles with a vitamin-rich oil or cuticle cream to promote strength and health, preparing them for your next stylish creation.
To wrap up
To wrap up, submerging into the world of DIY Easter nail art is a fun and creative way to express your festive spirit. With the step-by-step tutorials provided, you now have the tools to transform your nails into a canvas that showcases your unique style. Whether you opt for colorful egg patterns, pastel hues, or whimsical bunnies, each design allows you to personalize your look for the holiday. By following these beginner-friendly techniques, you can confidently create beautiful nail art that will impress your friends and family.
As you begin on your nail art journey, embrace the trial and error that comes with the learning process. Practice will enhance your skills, and soon you’ll find yourself experimenting with more complex designs and techniques. So gather your supplies and dedicate some time to this enjoyable activity. Let your creativity flow this Easter, and enjoy the satisfaction of showcasing your handcrafted nails that reflect both your personality and festive cheer.